
Mobile App
Build a mobile app with Dioxus!
Example: Todo App
Support
Mobile is currently the least-supported renderer target for Dioxus. Mobile apps are rendered with either the platform's WebView or experimentally with WGPU. WebView doesn't support animations, transparency, and native widgets.
Mobile support is currently best suited for CRUD-style apps, ideally for internal teams who need to develop quickly but don't care much about animations or native widgets.
Getting Set up
Getting set up with mobile can be quite challenging. The tooling here isn't great (yet) and might take some hacking around to get things working.
Setting up dependencies
Android
First, install the rust Android targets:
rustup target add aarch64-linux-android armv7-linux-androideabi i686-linux-android x86_64-linux-android
To develop on Android, you will need to install Android Studio.
Once you have installed Android Studio, you will need to install the Android SDK and NDK:
- Create a blank Android project
- Select Tools > SDK manager
- Navigate to the SDK tools window:
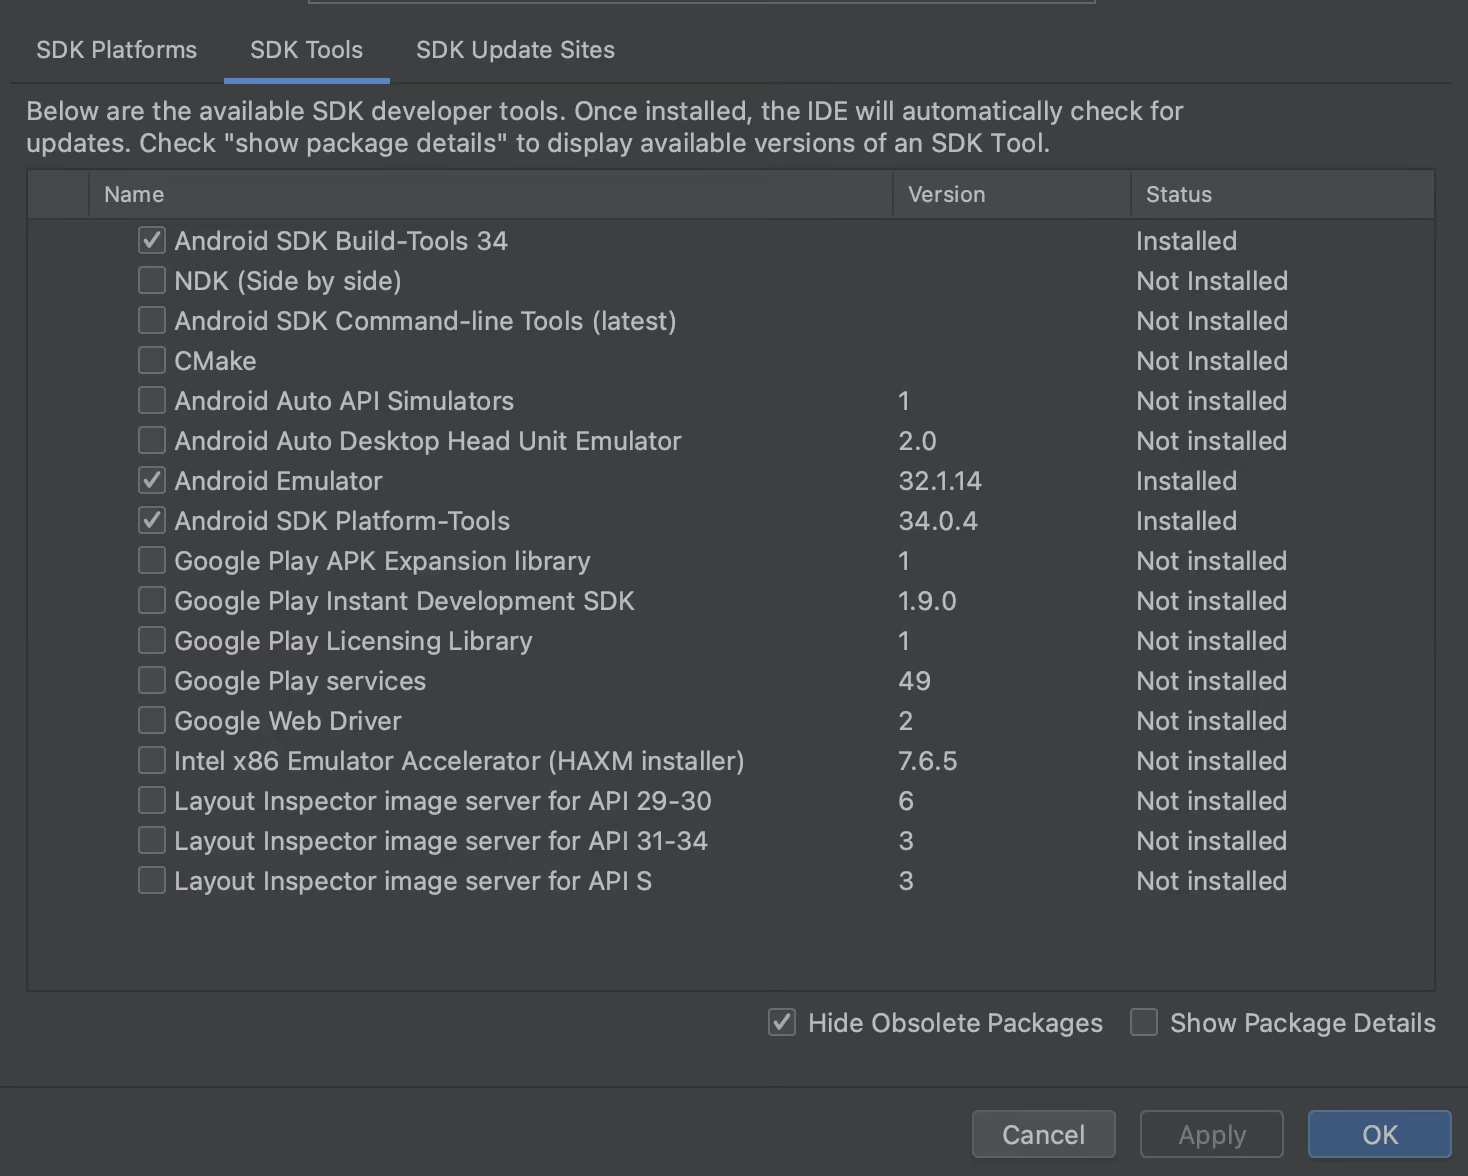
Then select:
- The SDK
- The SDK Command line tools
- The NDK (side by side)
- CMAKE
- Select apply and follow the prompts
More details that could be useful for debugging any errors you encounter are available in the official android docs
Next set the Java, Android and NDK home variables:
Mac:
export JAVA_HOME="/Applications/Android Studio.app/Contents/jbr/Contents/Home"
export ANDROID_HOME="$HOME/Library/Android/sdk"
export NDK_HOME="$ANDROID_HOME/ndk/25.2.9519653"
Windows:
[System.Environment]::SetEnvironmentVariable("JAVA_HOME", "C:\Program Files\Android\Android Studio\jbr", "User")
[System.Environment]::SetEnvironmentVariable("ANDROID_HOME", "$env:LocalAppData\Android\Sdk", "User")
[System.Environment]::SetEnvironmentVariable("NDK_HOME", "$env:LocalAppData\Android\Sdk\ndk\25.2.9519653", "User")
The NDK version in the paths should match the version you installed in the last step
IOS
First, install the rust IOS targets:
rustup target add aarch64-apple-ios x86_64-apple-ios aarch64-apple-ios-sim
To develop on IOS, you will need to install XCode.
Note: On Apple silicon you must run Xcode on rosetta. Goto Application > Right Click Xcode > Get Info > Open in Rosetta.If you are using M1, you will have to run cargo build --target x86_64-apple-ios instead of cargo apple build if you want to run in simulator.
Setting up your project
First, we need to create a rust project:
cargo new dioxus-mobile-test --lib
cd dioxus-mobile-test
Next, we can use cargo-mobile2 to create a project for mobile:
cargo install --git https://github.com/tauri-apps/cargo-mobile2
cargo mobile init
When you run cargo mobile init, you will be asked a series of questions about your project. One of those questions is what template you should use. Dioxus currently doesn't have a template in Tauri mobile, instead you can use the wry template.
You may also be asked to input your team ID for IOS. You can find your team id here or create a team id by creating a developer account here
Next, we need to modify our dependencies to include dioxus and ensure the right version of wry is installed. Change the [dependencies] section of your Cargo.toml:
[dependencies]
anyhow = "1.0.56"
log = "0.4.11"
dioxus = { version = "0.5", features = ["mobile"] }
wry = "0.35.0"
tao = "0.25.0"
Finally, we need to add a component to renderer. Replace the wry template in your lib.rs file with this code:
use anyhow::Result;
use dioxus::prelude::*;

#[cfg(target_os = "android")]
fn init_logging() {
    android_logger::init_once(
        android_logger::Config::default()
            .with_max_level(log::LevelFilter::Trace)
    );
}

#[cfg(not(target_os = "android"))]
fn init_logging() {
    env_logger::init();
}

#[cfg(any(target_os = "android", target_os = "ios"))]
fn stop_unwind<F: FnOnce() -> T, T>(f: F) -> T {
    match std::panic::catch_unwind(std::panic::AssertUnwindSafe(f)) {
        Ok(t) => t,
        Err(err) => {
            eprintln!("attempt to unwind out of `rust` with err: {:?}", err);
            std::process::abort()
        }
    }
}

#[no_mangle]
#[inline(never)]
#[cfg(any(target_os = "android", target_os = "ios"))]
pub extern "C" fn start_app() {
    fn _start_app() {
        stop_unwind(|| main().unwrap());
    }

    #[cfg(target_os = "android")]
    {
        tao::android_binding!(
            com_example,
            dioxus_mobile_test,
            WryActivity,
            wry::android_setup, // pass the wry::android_setup function to tao which will invoke when the event loop is created
            _start_app
        );
        wry::android_binding!(com_example, dioxus_mobile_test);
    }
    #[cfg(target_os = "ios")]
    _start_app()
}

pub fn main() -> Result<()> {
    init_logging();

    launch(app);

    Ok(())
}

fn app() -> Element {
    let mut items = use_signal(|| vec![1, 2, 3]);

    log::debug!("Hello from the app");

    rsx! {
        div {
            h1 { "Hello, Mobile"}
            div { margin_left: "auto", margin_right: "auto", width: "200px", padding: "10px", border: "1px solid black",
                button {
                    onclick: move|_| {
                        println!("Clicked!");
                        let mut items_mut = items.write();
                        let new_item = items_mut.len() + 1;
                        items_mut.push(new_item);
                        println!("Requested update");
                    },
                    "Add item"
                }
                for item in items.read().iter() {
                    div { "- {item}" }
                }
            }
        }
    }
}
Running
From there, you'll want to get a build of the crate using whichever platform you're targeting (simulator or actual hardware). For now, we'll just stick with the simulator.
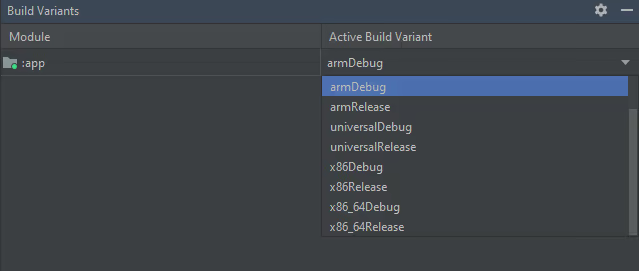
First, you need to make sure that the build variant is correct in Android Studio:
- Click "Build" in the top menu bar.
- Click "Select Build Variant..." in the dropdown.
- Find the "Build Variants" panel and use the dropdown to change the selected build variant.

Android
To build your project on Android you can run:
cargo android build
Next, open Android studio:
cargo android open
This will open an android studio project for this application.
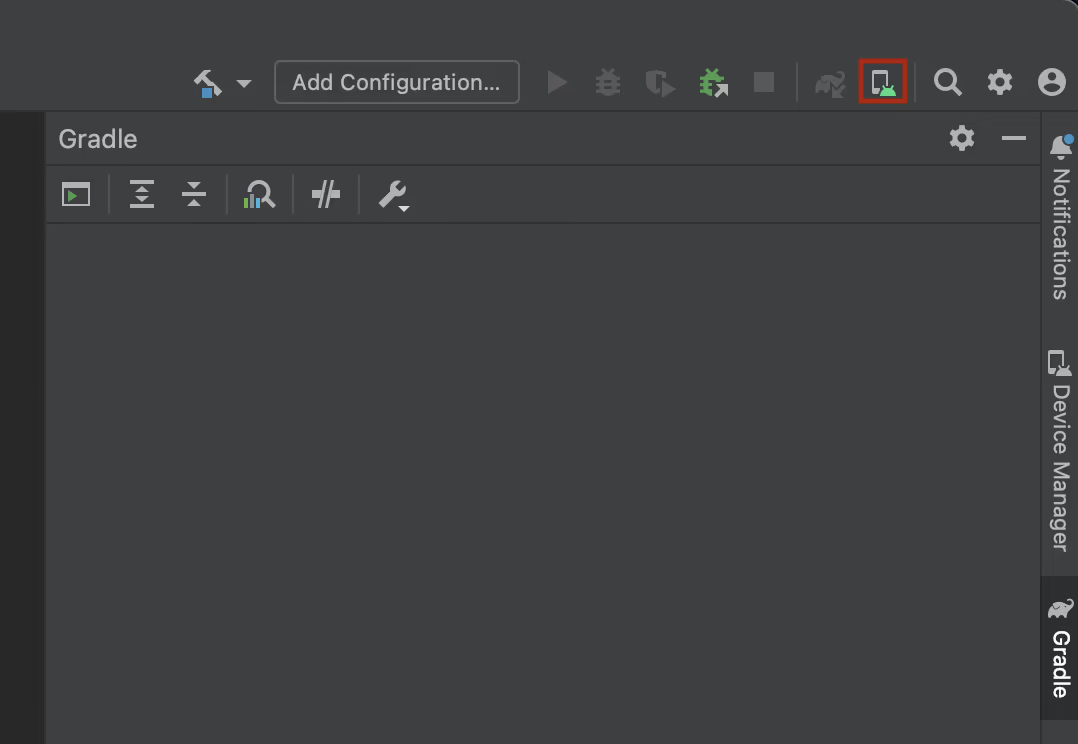
Next we need to create a simulator in Android studio to run our app in. To create a simulator click on the phone icon in the top right of Android studio:
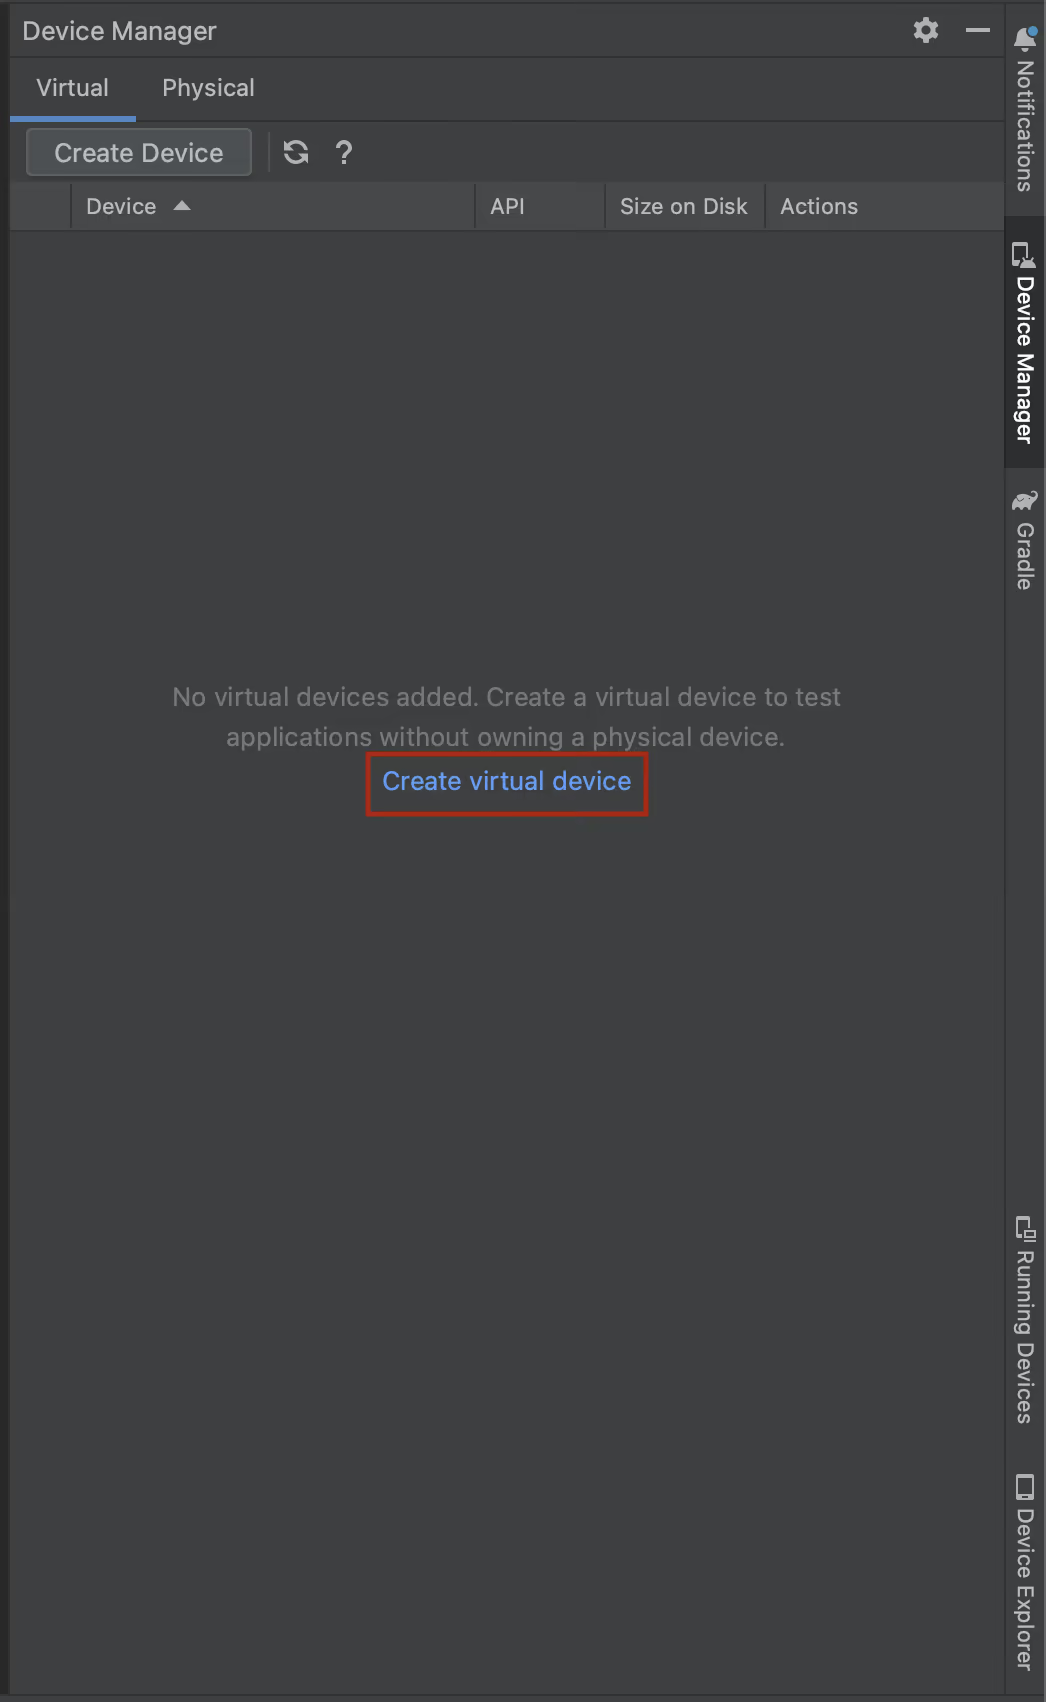
Then click the create a virtual device button and follow the prompts:
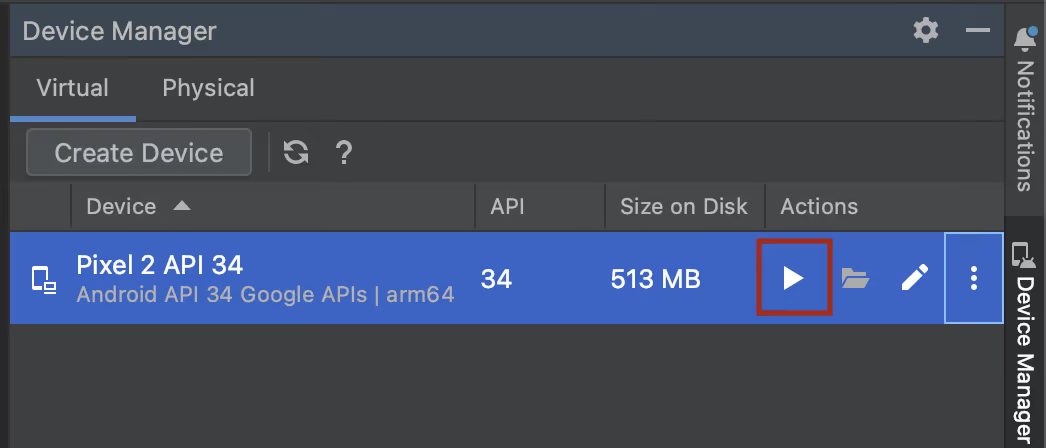
Finally, launch your device by clicking the play button on the device you created:
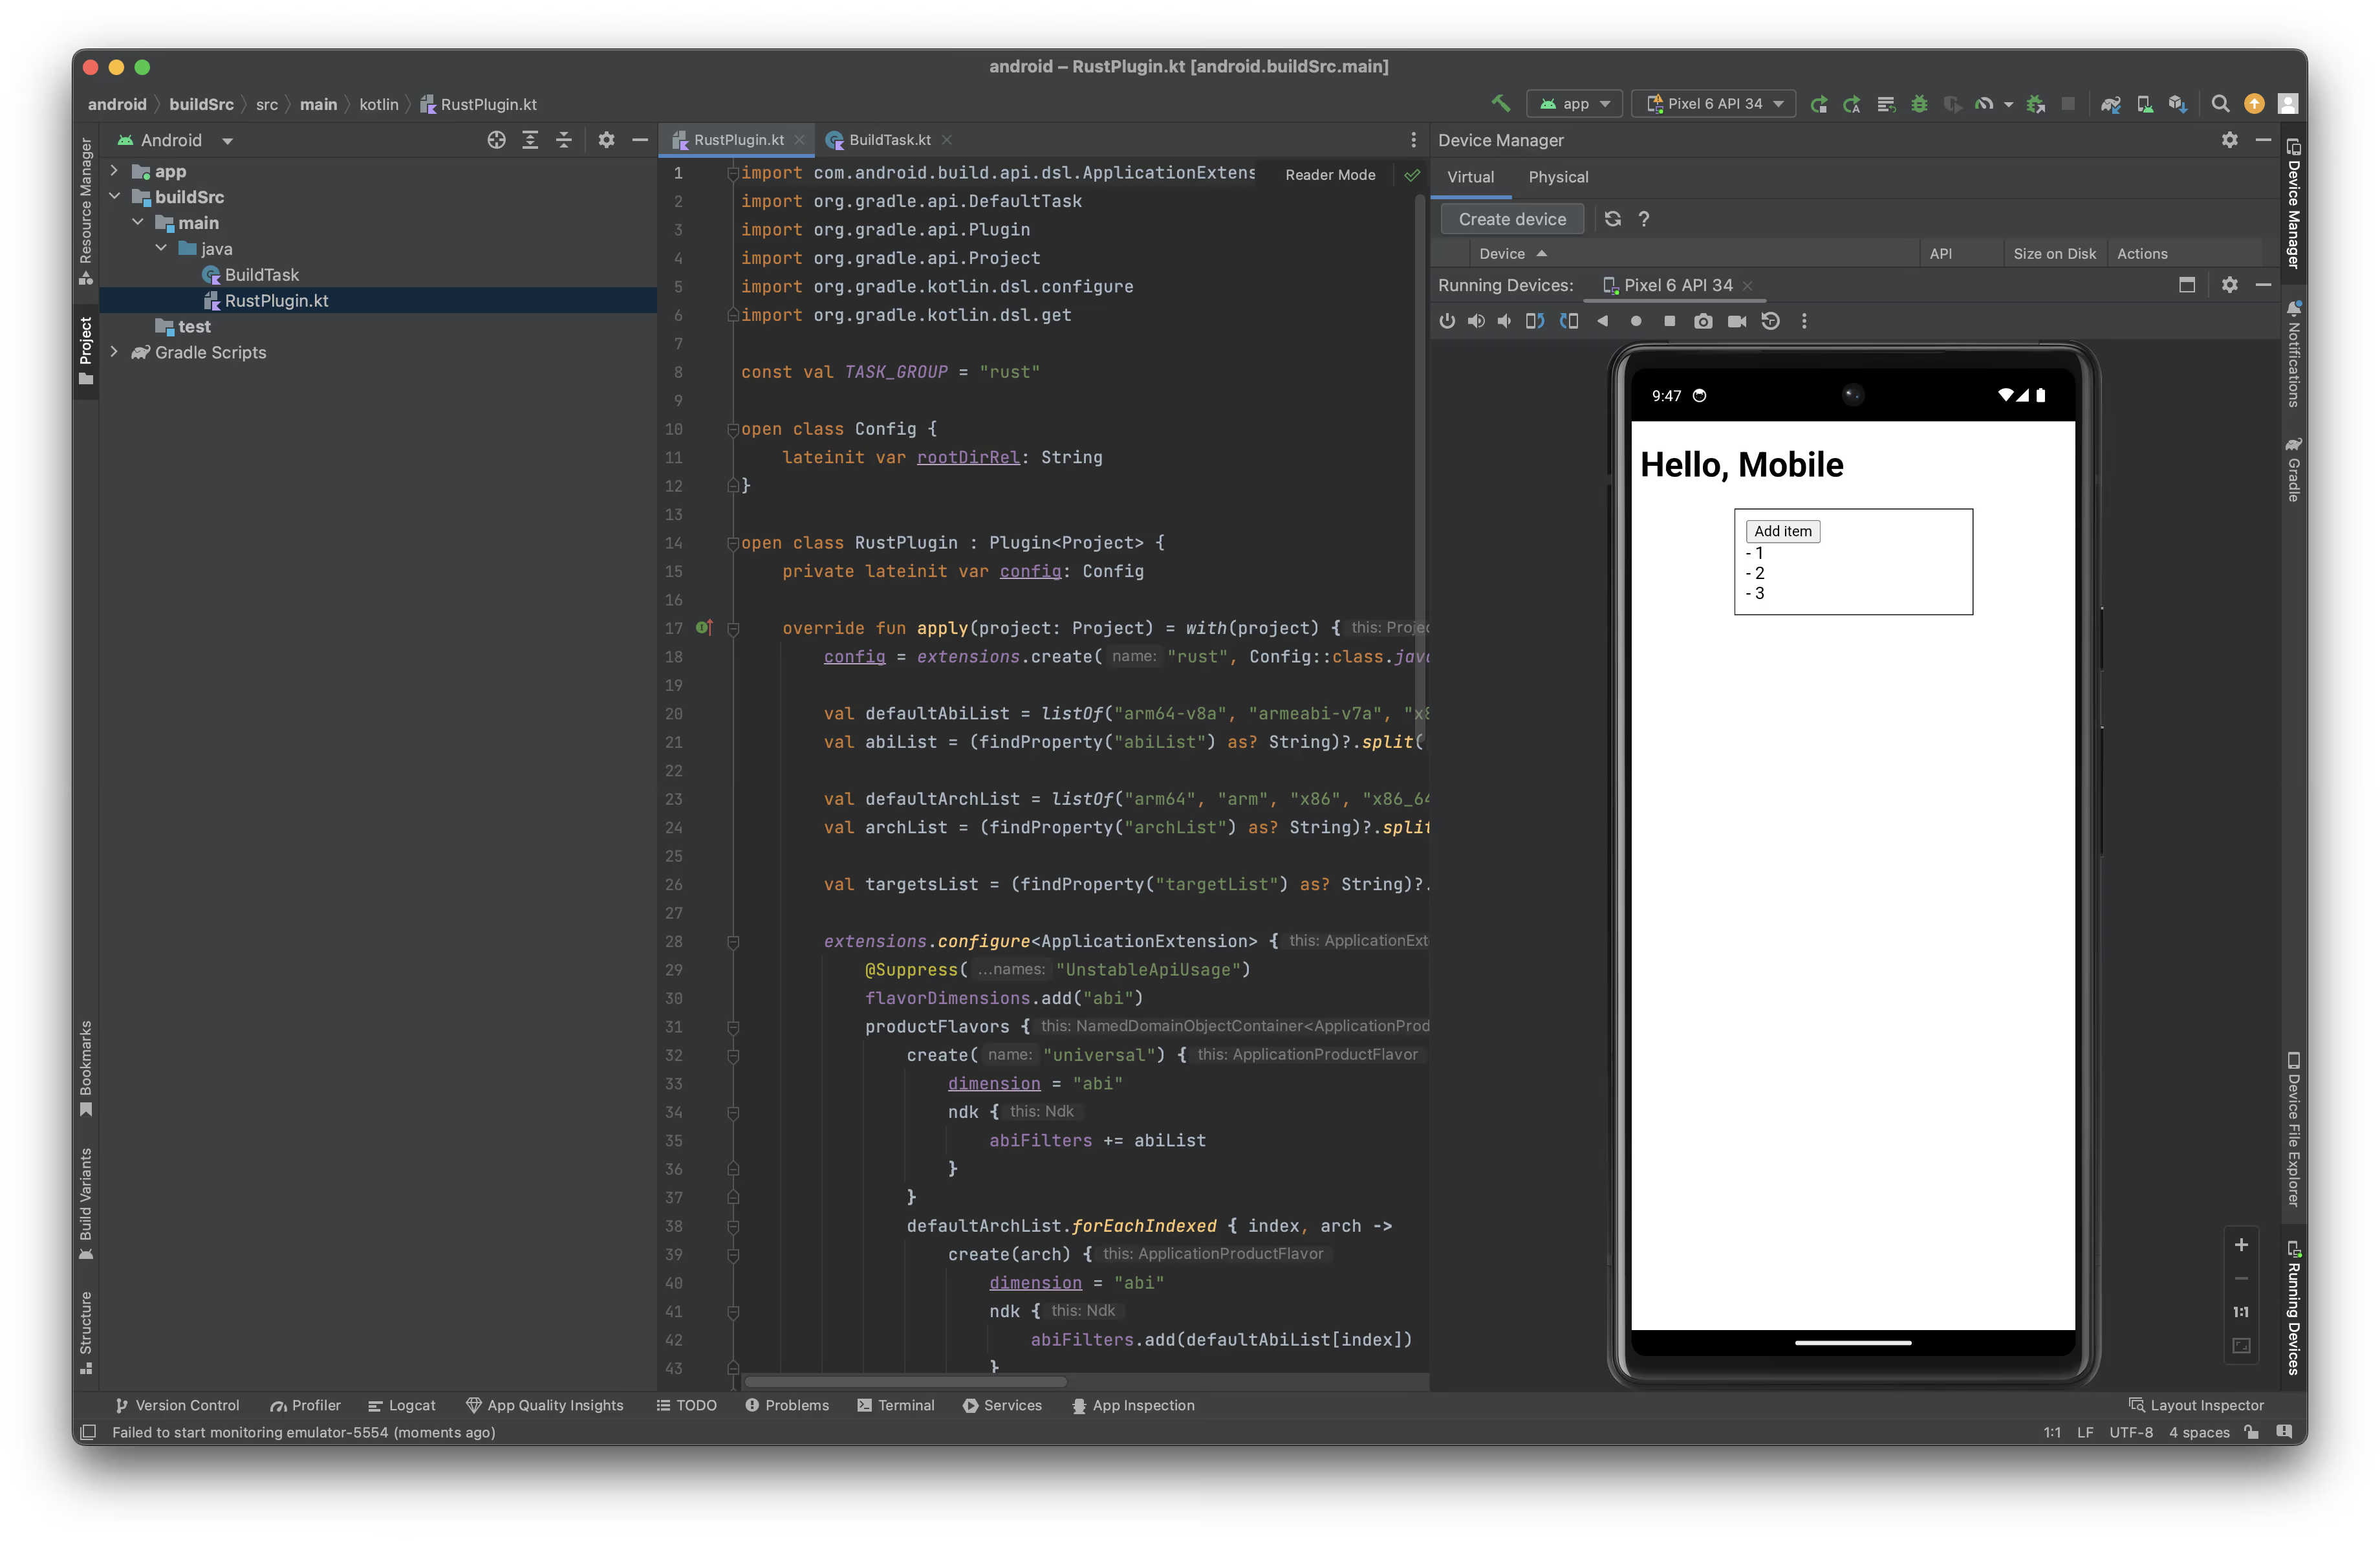
Now you can start your application from your terminal by running:
cargo android run
More information is available in the Android docs:
- https://developer.android.com/ndk/guides
- https://developer.android.com/studio/projects/install-ndk
- https://source.android.com/docs/setup/build/rust/building-rust-modules/overview
IOS
To build your project for IOS, you can run:
cargo build --target aarch64-apple-ios-sim
Next, open XCode (this might take awhile if you've never opened XCode before):
cargo apple open
This will open XCode with this particular project.
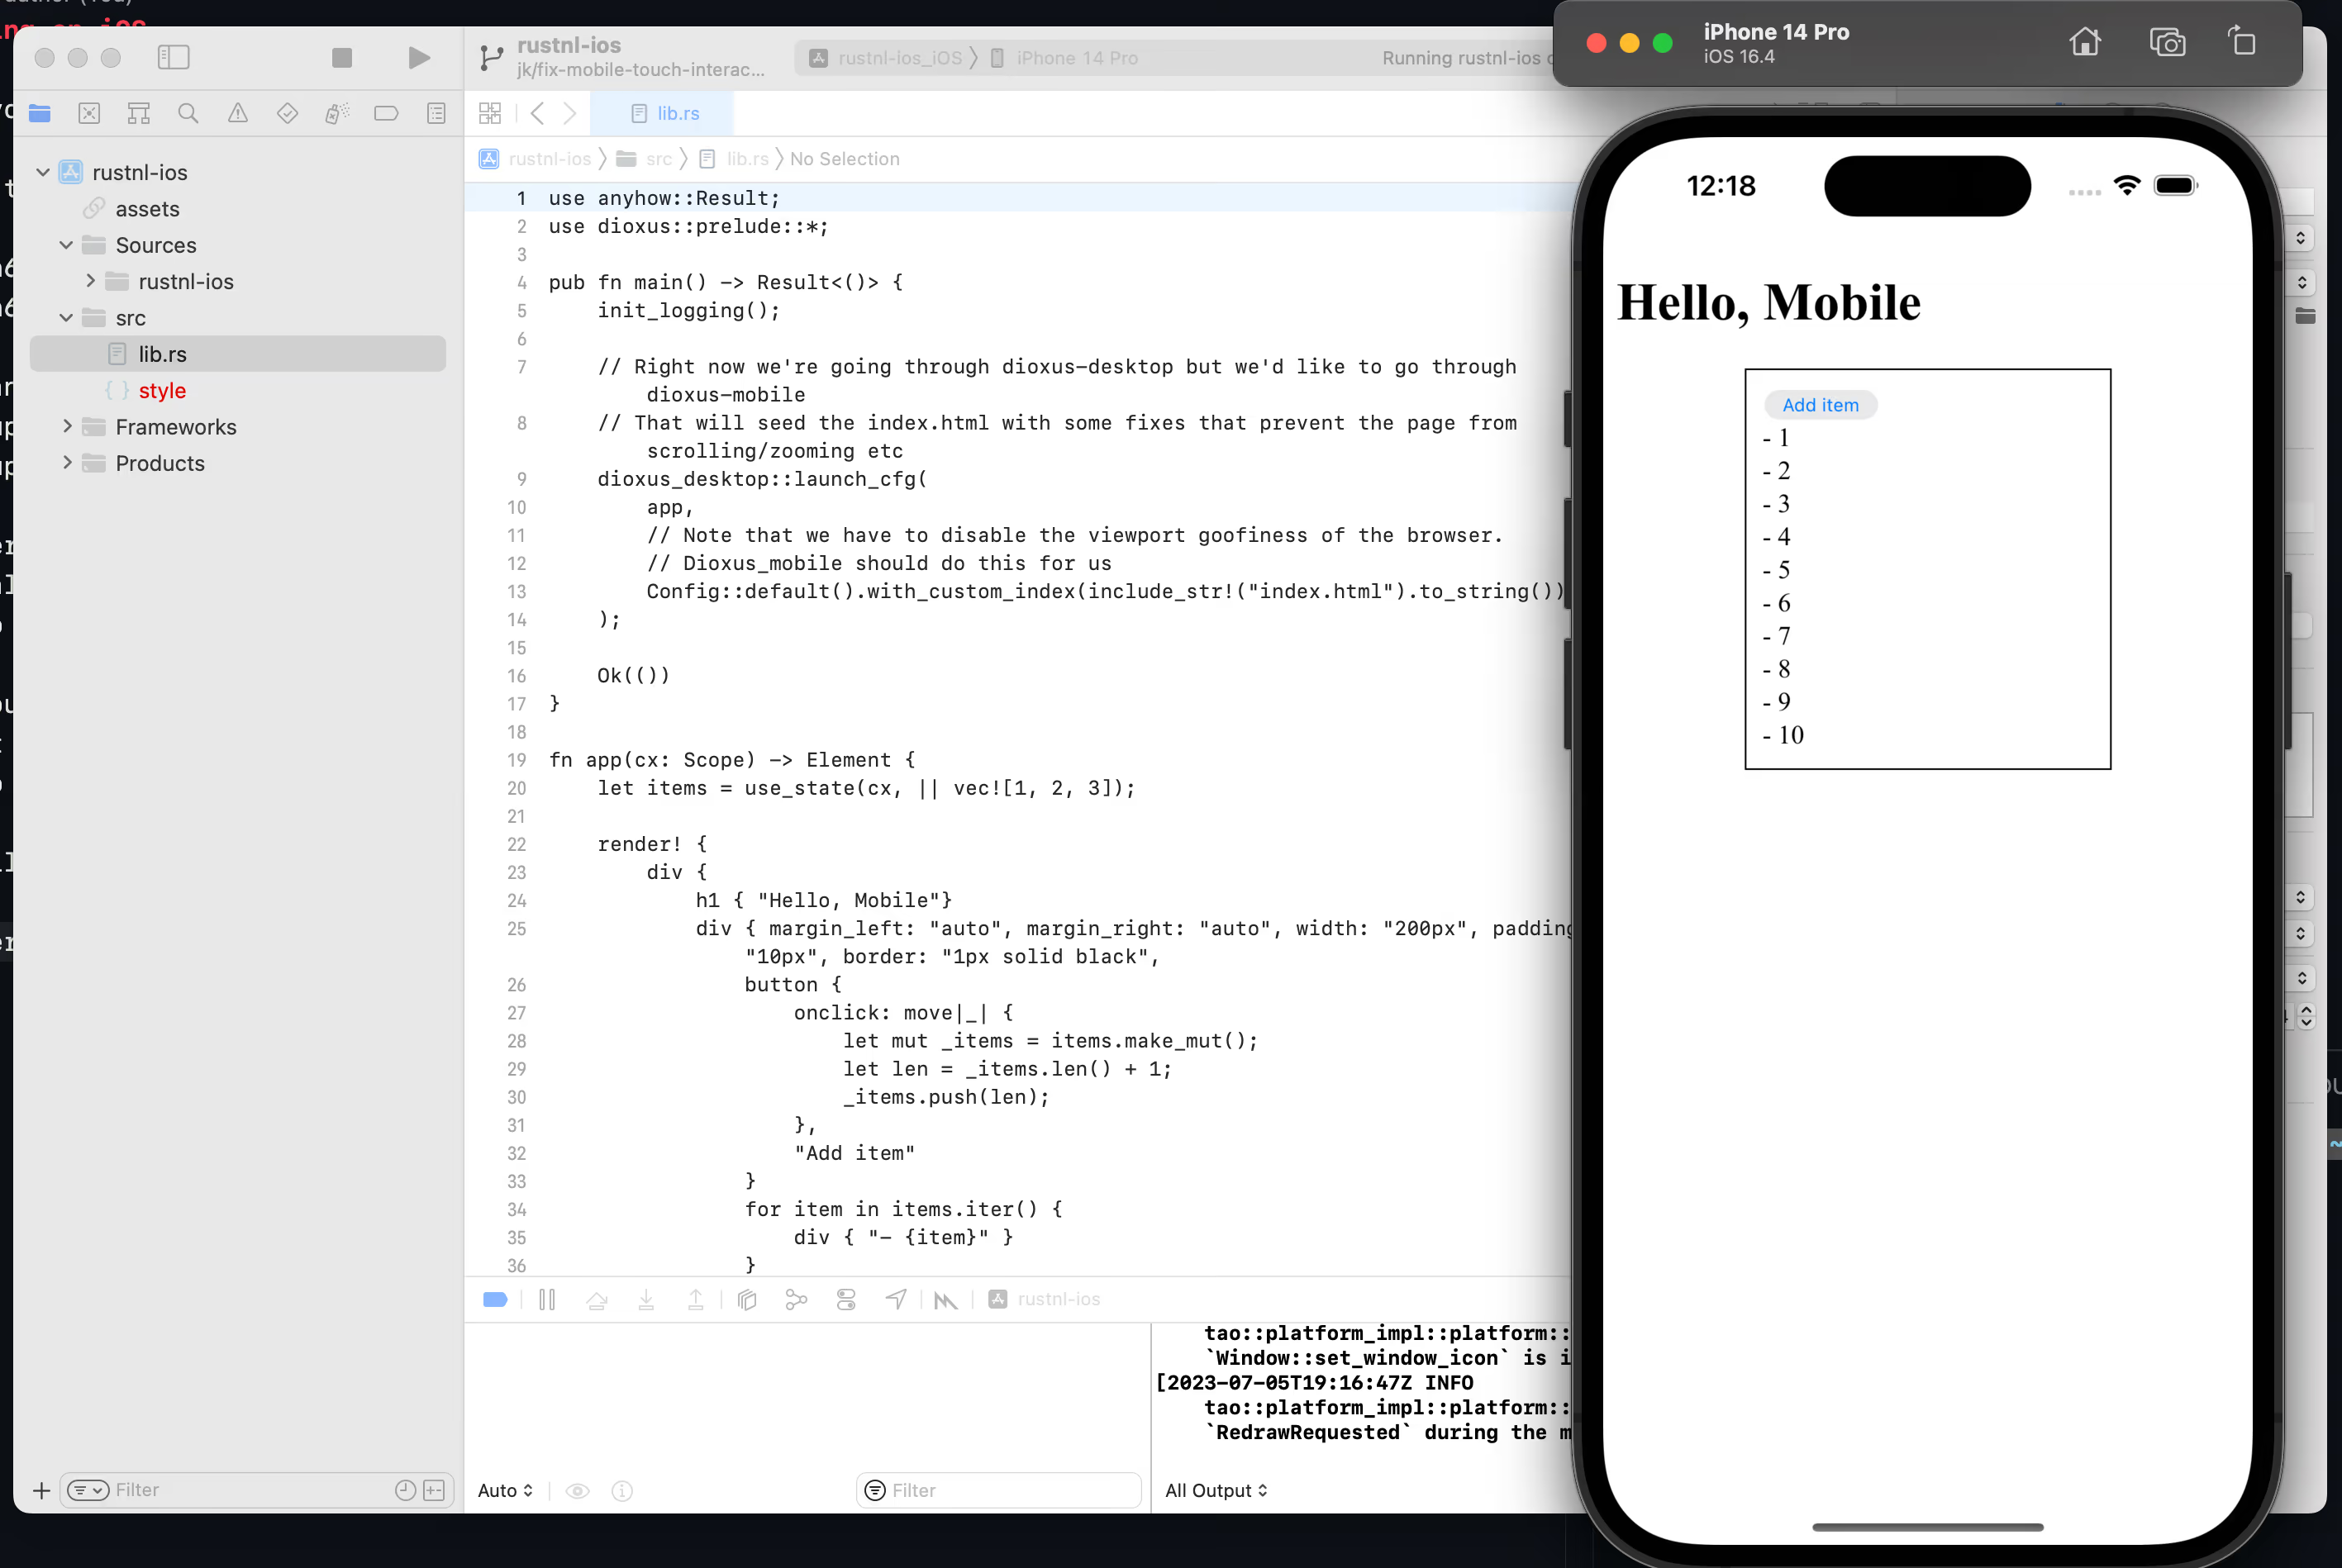
From there, just click the "play" button with the right target and the app should be running!
Note that clicking play doesn't cause a new build, so you'll need to keep rebuilding the app between changes. The tooling here is very young, so please be patient. If you want to contribute to make things easier, please do! We'll be happy to help.