Styling and Assets
Unfortunately, our HotDog app isn't quite ready to show off - it's completely unstyled!
In this chapter we'll cover adding assets and styles to our app.
Dioxus uses CSS for Styling
As mentioned earlier, Dioxus apps use HTML and CSS as the core markup and styling technology. Instead of re-inventing the wheel like Flutter and React-Native, we designed Dioxus to use HTML and CSS on every platform.
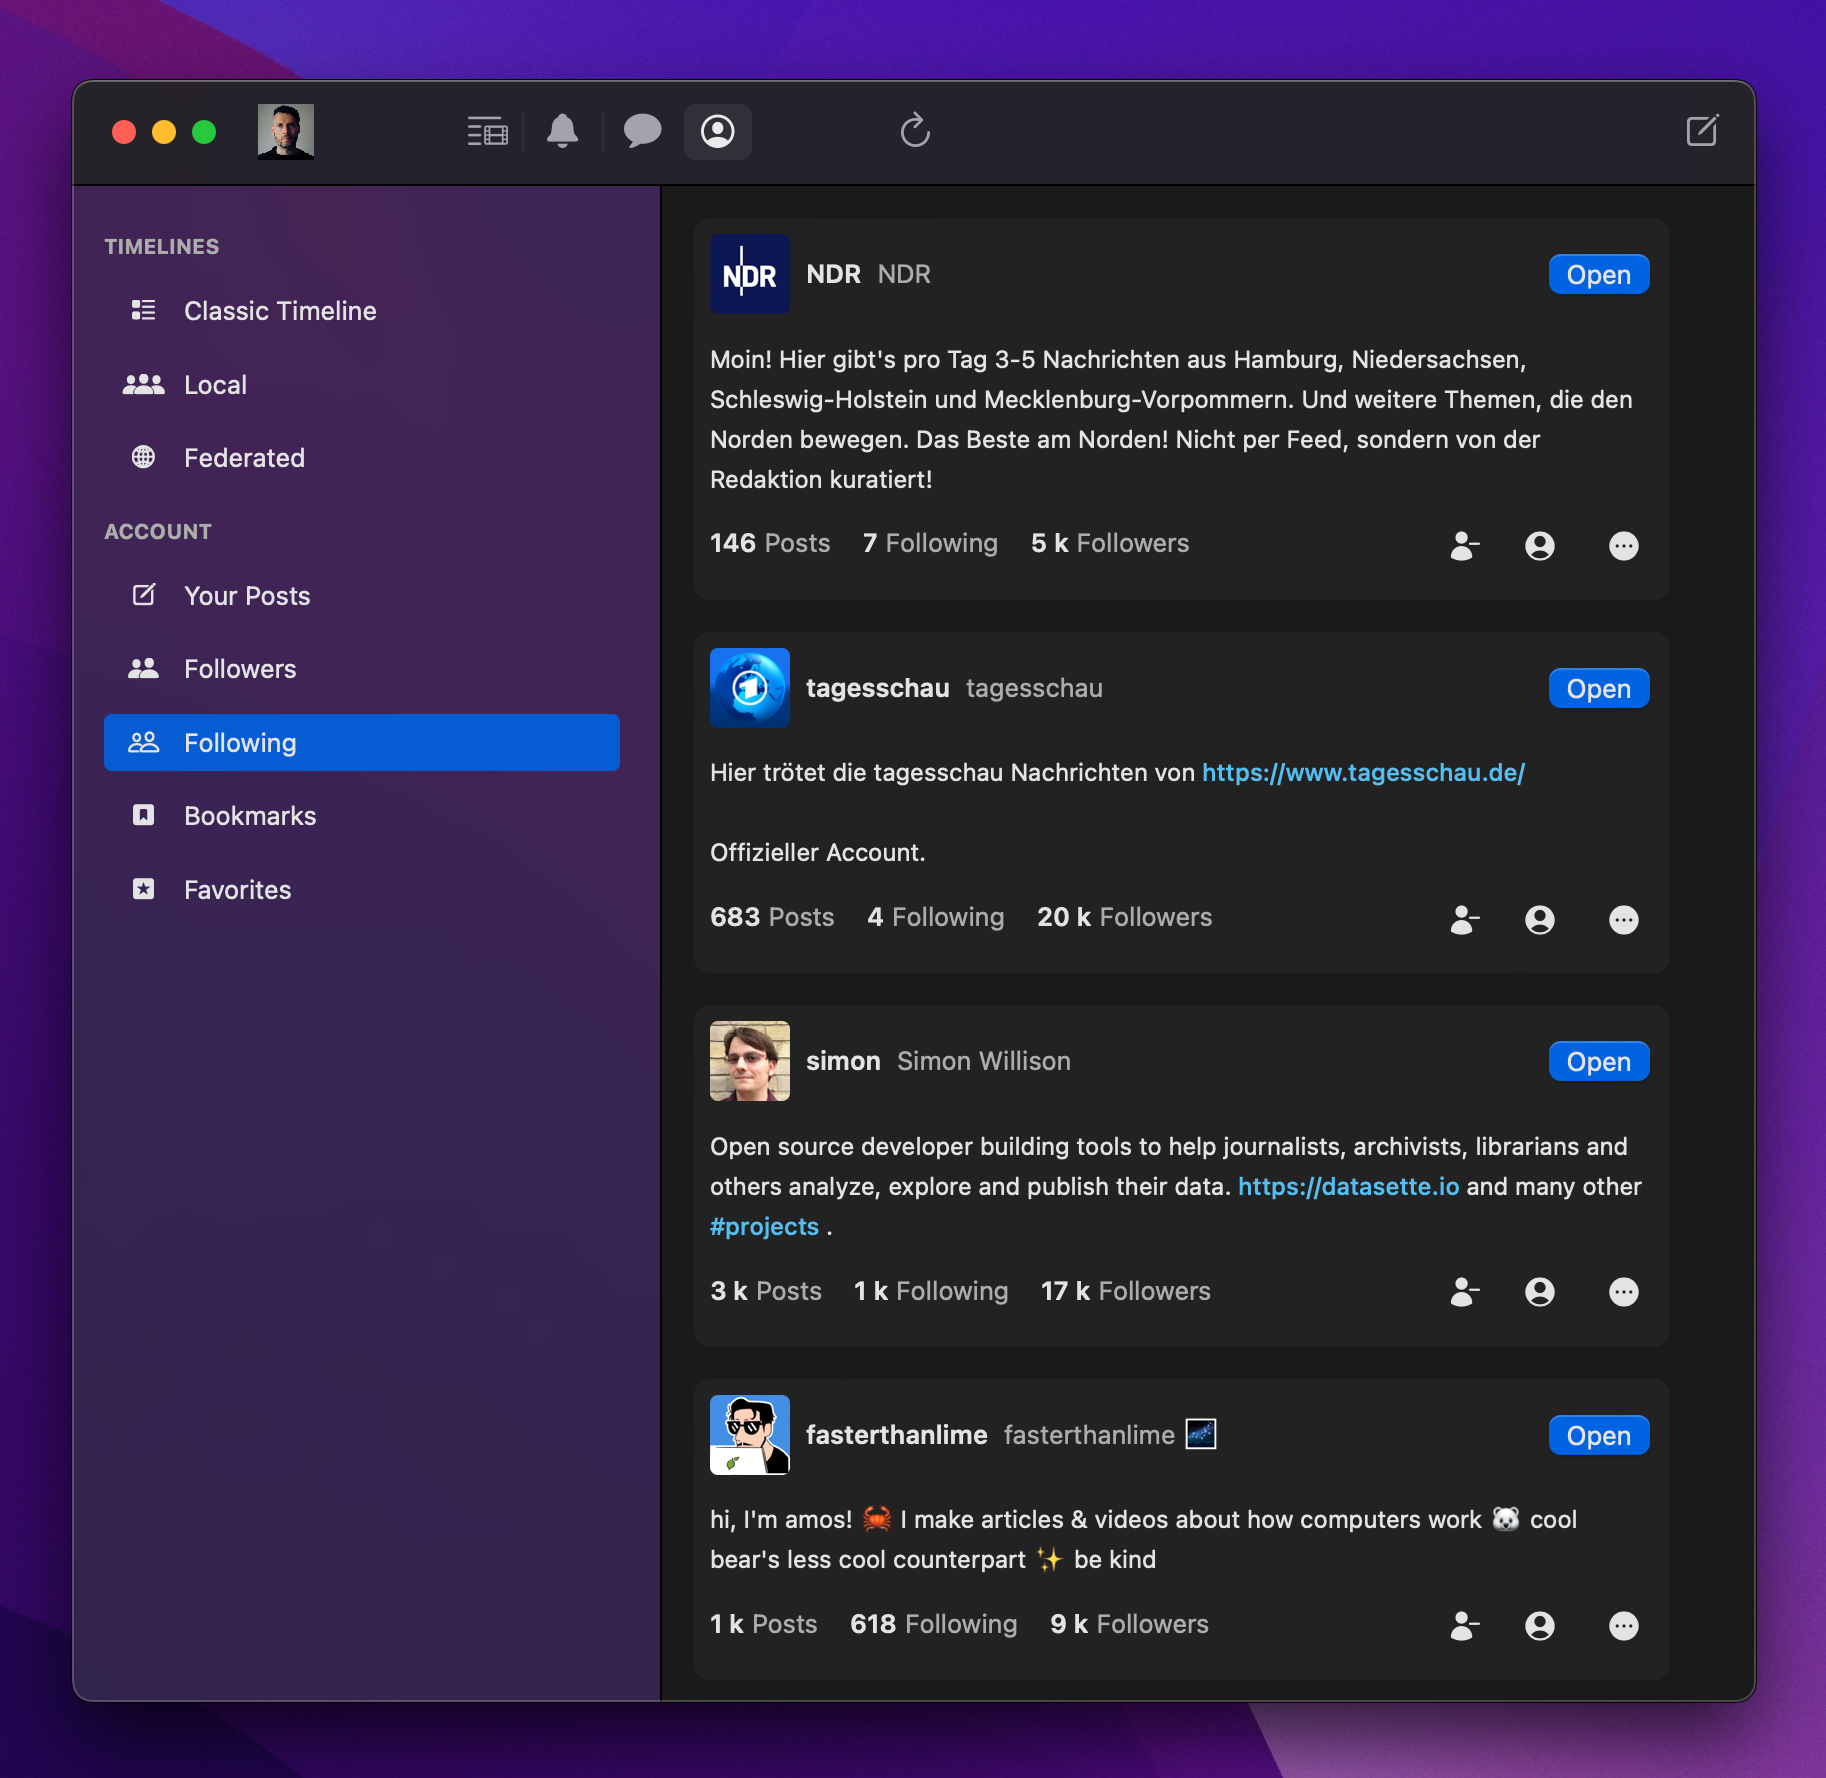
CSS is by-far the most popular styling system and is extremely capable. For example, here's a screenshot of ebou, a very beautiful Mastodon client built with Dioxus.

HTML and CSS are very powerful - don't worry about being too limited!
Adding the CSS File with asset!()
The bare-bones template already includes a base main.css in the assets folder.
├── Cargo.toml
├── assets
│   └── main.css
└── src
    └── main.rs
To include the CSS in our app, we can use the asset!() macro. This macro ensures the asset will be included in the final app bundle.
static CSS: Asset = asset!("/assets/main.css");
We also need to load the asset into our app using the document::Stylesheet component. This component is equivalent to the <link> HTML element but also ensures the CSS will be pre-loaded during server-side-rendering.
fn App() -> Element {
    rsx! {
        document::Stylesheet { href: CSS }
    }
}
Unlike Rust's include_str!() macro, the asset!() macro does not actually include the contents of the asset in our final executable. Instead, it generates a unique path so that the asset can be loaded at runtime. This is ideal for web apps where assets are loaded in parallel through different HTTP requests.
📣 The
asset!()macro generates a unique name that won't exactly match the input name. This helps prevents name collisions and improves caching.
Hot-Reloading
All assets in Dioxus participate in hot-reloading. Try editing your app's main.css and watch changes propagate in real time.
Including Images
In Dioxus, you can include images in two ways:
- Dynamically with a URL
- Statically with the
asset!()macro.
When including assets with a URL, simply fill the src attribute of img {}. Note that when the app is offline, URL-based images won't download.
rsx! {
    // ...
    div {
        img { src: "https://images.dog.ceo/breeds/pitbull/dog-3981540_1280.jpg" }
    }
}
For static images, you can use the same asset!() macro that we used to include the app's CSS.
static ICON: Asset = asset!("/assets/icon.png");

rsx! {
    img { src: ICON }
}
Optimizations
By default, the asset!() macro will lightly optimize CSS, JavaScript, JSON, and images. The name of the asset will also be modified to include a content hash.
// would output main-j1238nask123.css
asset!("/assets/main.css").to_string();
You can optimize assets even further, with an optional Options struct. For example, dx can automatically convert .png images to a more optimized .avif format:
// outputs icon-j1238jd2.avif
asset!("/assets/icon.png", ImageAssetOptions::new().with_avif());
For many apps, asset optimization is the most effective way of improving load times. As developers, we frequently overlook the size of images and accidentally make our sites load slower.
Check out the assets guide for a more in-depth explanation of how the Dioxus asset system works.
The Final CSS
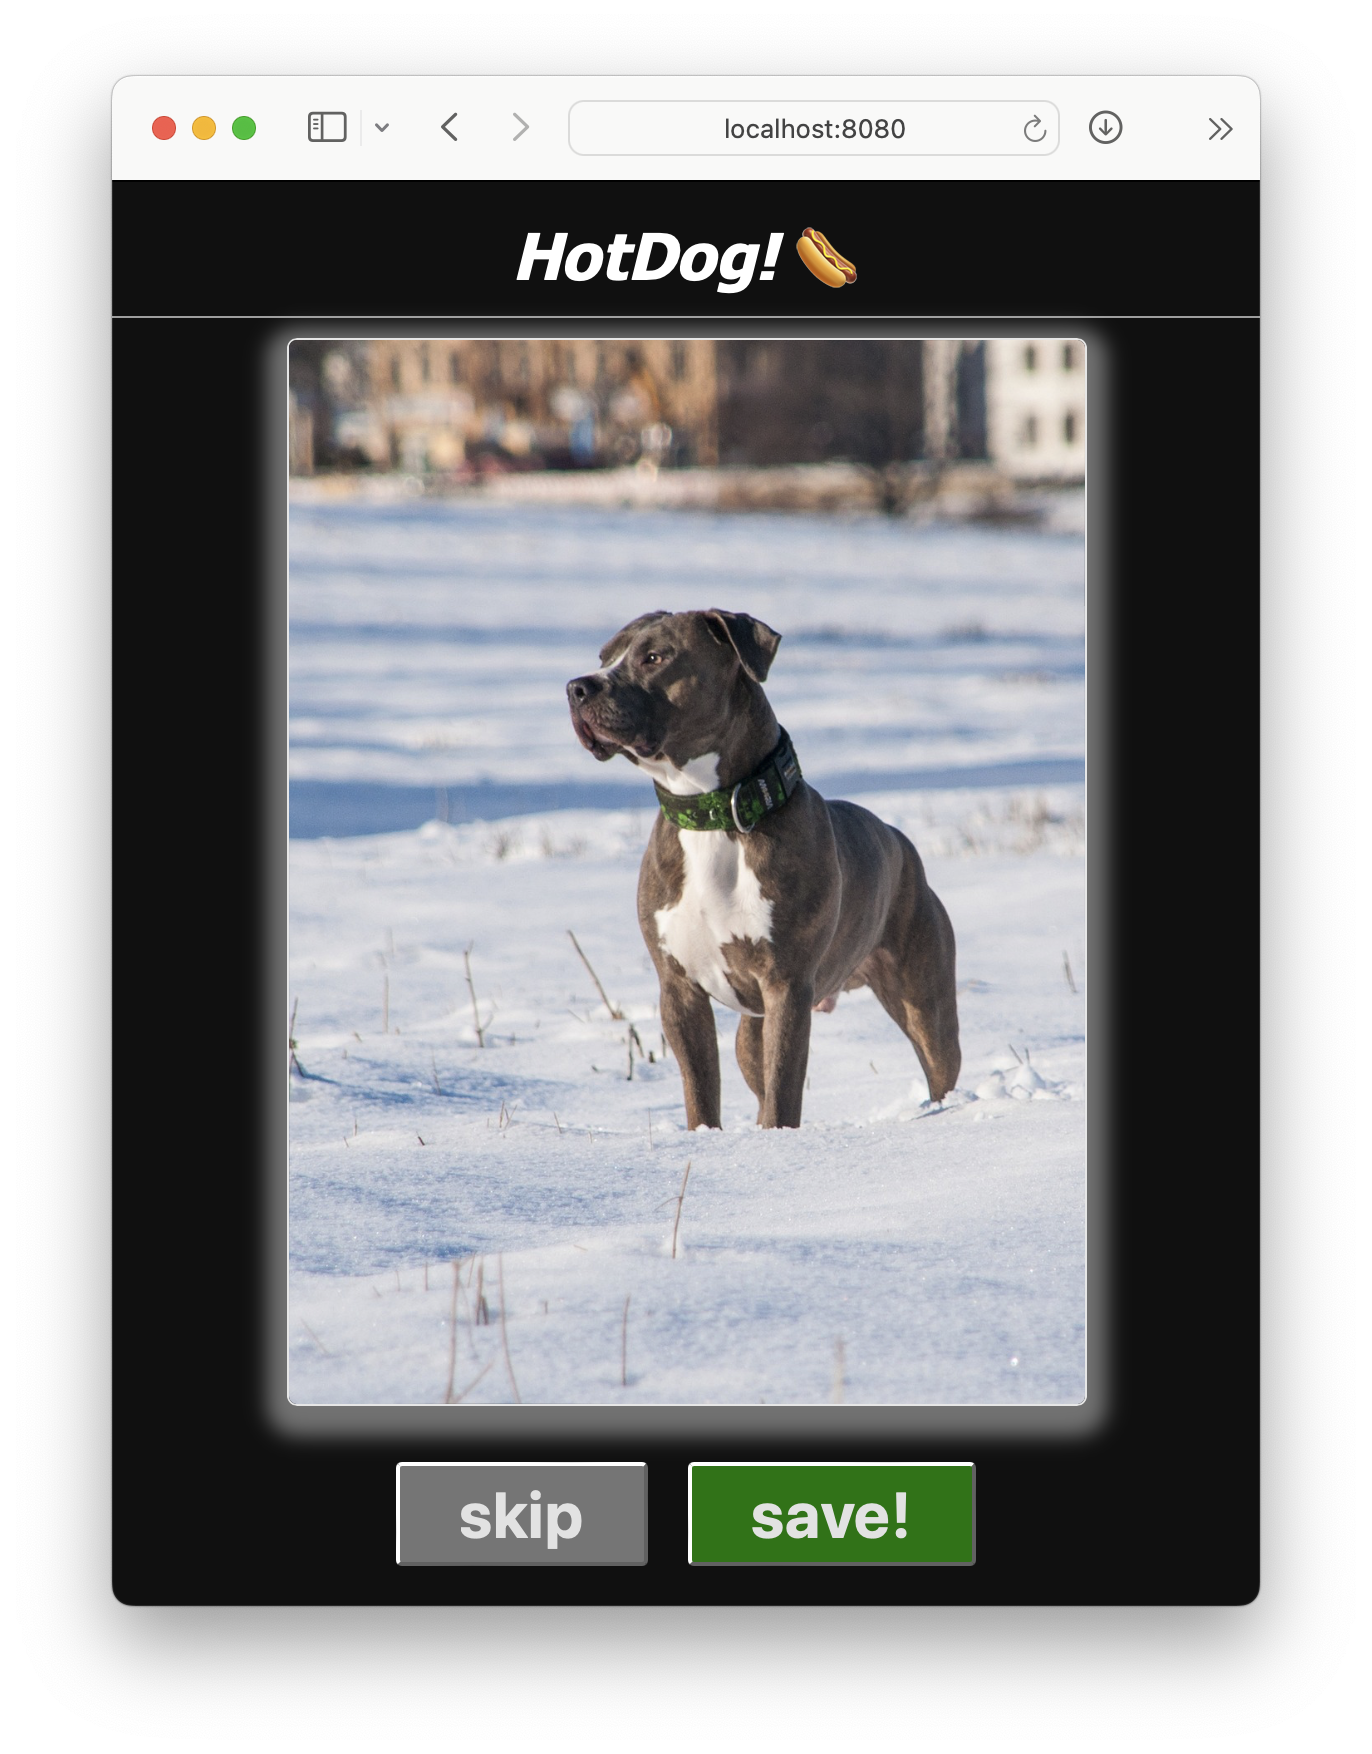
We can use the asset hot-reload system of dx and our knowledge of CSS to create a beautiful app:

The final CSS is here for reference:
/* App-wide styling */
html, body {
    background-color: #0e0e0e;
    color: white;
    font-family: 'Segoe UI', Tahoma, Geneva, Verdana, sans-serif;
    height: 100%;
    width: 100%;
    overflow: hidden;
    margin: 0;
}

#main {
    display: flex;
    flex-direction: column;
    height: 100%;
    justify-content: space-between;
}

#dogview {
    max-height: 80vh;
    flex-grow: 1;
    width: 100%;
    display: flex;
    flex-direction: column;
    align-items: center;
    justify-content: center;
}

#dogview img {
    display: block;
    max-width: 50%;
    max-height: 50%;
    transform: scale(1.8);
    border-radius: 5px;
    border: 1px solid rgb(233, 233, 233);
    box-shadow: 0px 0px 5px 1px rgb(216, 216, 216, 0.5);
}

#title {
    text-align: center;
    padding-top: 10px;
    border-bottom: 1px solid #a8a8a8;
    display: flex;
    flex-direction: row;
    justify-content: space-evenly;
    align-items: center;
}

#title a {
    text-decoration: none;
    color: white;
}

a#heart {
    background-color: white;
    color: red;
    padding: 5px;
    border-radius: 5px;
}

#title span {
    width: 20px;
}

#title h1 {
    margin: 0.25em;
    font-style: italic;
}

#buttons {
    display: flex;
    flex-direction: row;
    justify-content: center;
    gap: 20px;
    /* padding-top: 20px; */
    padding-bottom: 20px;
}

#skip { background-color: gray }
#save { background-color: green; }

#skip, #save {
    padding: 5px 30px 5px 30px;
    border-radius: 3px;
    font-size: 2rem;
    font-weight: bold;
    color: rgb(230, 230, 230)
}

#navbar {
    border: 1px solid rgb(233, 233, 233);
    border-width: 1px 0px 0px 0px;
    display: flex;
    flex-direction: row;
    justify-content: space-evenly;
    padding: 20px;
    gap: 20px;
}

#navbar a {
    background-color: #a8a8a8;
    border-radius: 5px;
    border: 1px solid black;
    text-decoration: none;
    color: black;
    padding: 10px 30px 10px 30px;
}

#favorites {
    flex-grow: 1;
    overflow: hidden;
    display: flex;
    flex-direction: column;
    padding: 10px;
}

#favorites-container {
    overflow-y: auto;
    overflow-x: hidden;
    display: flex;
    flex-direction: row;
    flex-wrap: wrap;
    justify-content: center;
    gap: 10px;
    padding: 10px;
}

.favorite-dog {
    max-height: 180px;
    max-width: 60%;
    position: relative;
}

.favorite-dog img {
    max-height: 150px;
    border-radius: 5px;
    margin: 5px;
}

.favorite-dog:hover button {
    display: block;
}

.favorite-dog button {
    display: none;
    position: absolute;
    bottom: 10px;
    left: 10px;
    z-index: 10;
}